This section describes how to create workflows.
Log into the system as root/root. To create a new workflow named Folder describing issues that are simple folders for other projects and tasks:
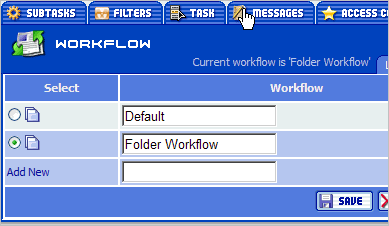
- Go to the root Projects task and click the Workflow tab. You will see the list of available workflows.
- Enter a name for a new workflow (Folder Workflow) into the input field and click the Save button.
A new workflow named Folder Workflow appears.
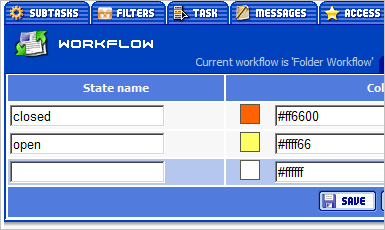
Then we can start editing it. Go to the States tab. Here you can specify the states for tasks in this workflow. We’ll create two states: open and closed.
- Enter open into the input field.
- Click the icon next to the Color field. A popup window will appear with a color palette. Click the color you wish to use for marking tasks in this state in the task list.
- Select the Start checkbox to specify that the open state will be used as the initial state for these tasks. Each workflow must have one initial state.
- Click the Save button.
Follow the same steps to create the closed state and mark it as the final state. Select the Final checkbox.
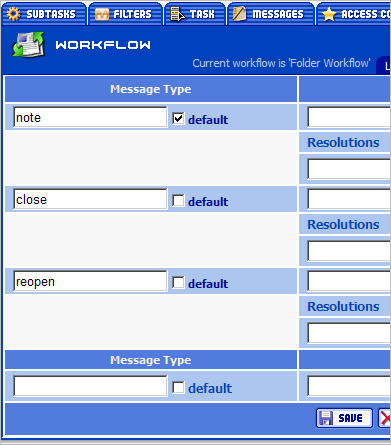
Now go to the Message Types tab. Here you can specify message types available for this workflow. One message type combines several similar transitions into one group. The name of a message type should be a verb.
Create the following message types:
- note – a simple message that does not change the task state. Specify that this message type is the default.
- close – a message that changes the state of a task from open to closed.
- reopen – a message that changes a task state from the closed state to the open state.
When you have finished, click the Save button.
Now go to the Transitions tab. Here you can specify what transitions and permissions correspond to each message type. To specify that adding a message of the note type does not change the state, select the closed/closed and open/open checkboxes.
You can also specify that messages of this type will be visible to all user groups (Can View = All), that all user groups can create a message of this type (Can Process = All) and can subscribe to e-mail notification about such messages (Receive Notifications=All).
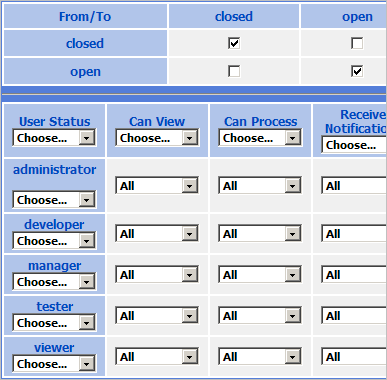
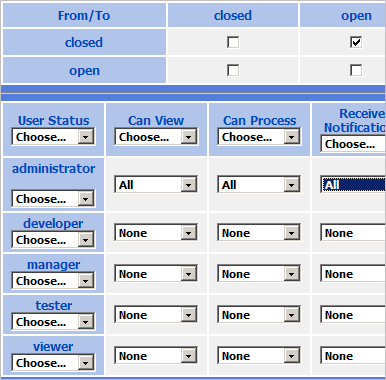
You can specify that adding a message of the close type changes the state from open to closed and that only an administrator can create a message of this type. To do this, select All from the drop-down box in the cell which intersects administrator and Can Process. Specify None for other types of users in the corresponding drop-down boxes. All groups of users can be allowed to perform the rest of the operations (Can View and Receive Notifications).
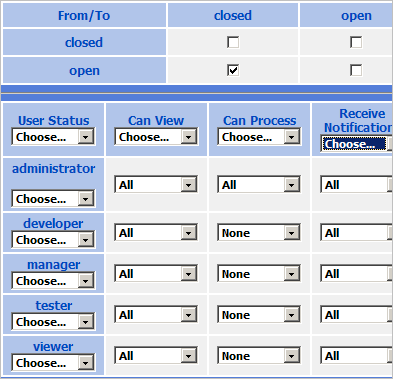
Now you can specify that adding a message of the reopen type changes the state from closed to open. Configure user permissions for this message type in the same way as for the above.
Click the Save button to save the settings.
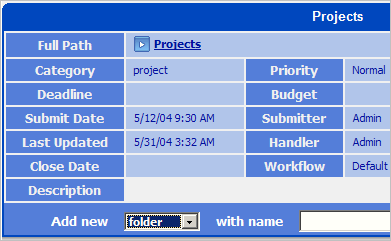
To be able to create tasks in this workflow, you should create a task category and specify that tasks from this category will use the workflow Folder Workflow. Go to the Categories tab. Use the Add New field to specify the name of the category: folder. Selecting the is project checkbox will allow you to select tasks from this category using the Quick Go drop-down box. Specify that tasks from this category will use the workflow Folder Workflow. Click the Save button.

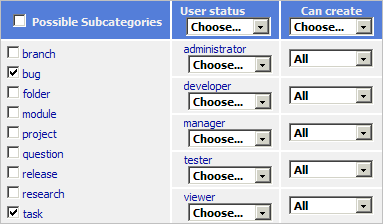
Now go to the Edit tab to edit the category. You will see the Possible Subcategories list and the table for configuring user permissions. Use Possible Categories to select which categories you want to use as subcategories of folder. (Eg. bug and task.) Then specify who can create, edit and delete tasks from the folder category. You can allow everyone to perform any of these operations by selecting All from the drop-down box in the upper-left corner. Click the Save button to save the settings.
Now we can specify that tasks from the Folder category can be used as subtasks of tasks from the project category. Go to the Categories->List tab. Select the project category from the category list and go to the Edit tab. All you need to do is select the Folder category from the Possible Subcategories list and click Save.
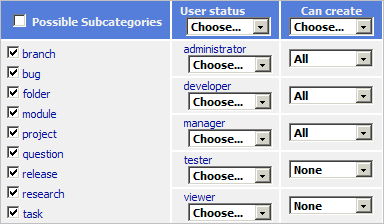
Now you can create issues from the folder category and with the workflow Folder Workflow.
 Description