The following topic describes how to transfer the data stored in the TrackStudio database to another DBMS.
 Description
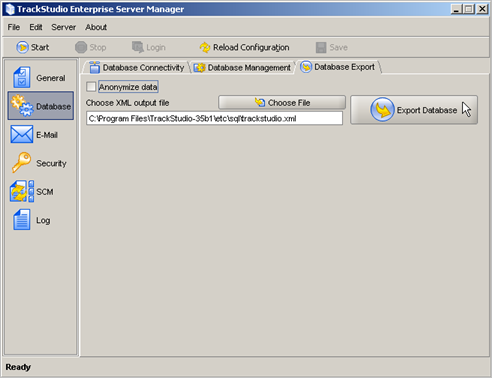
To export the data into XML:
- Stop TrackStudio, if it is running.
- Start Server Manager (available in TrackStudio SA only).
- Select the Database -> Database Connectivity tab.
- Enter the JDBC connection properties.
- Select the General tab.
- Specify the character encoding of the database.
- Select the Database -> Database Export tab.
- Specify the name of the file to which the data will be exported.
- Mark the Anonymize data checkbox to remove sensitive information from export file you send to TrackStudio Support.
- Click the Export Database button.
You should now have an XML file containing all the information from the tables in your TrackStudio database. You can edit and view these using any text editor.
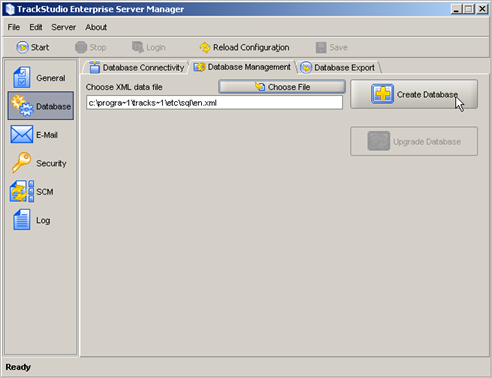
To import the data into a database:
- Stop TrackStudio, if it is running.
- Start Server Manager (available in TrackStudio SA only).
- Select the Database -> Database Connectivity tab.
- Enter the JDBC connection properties of the empty database (without any tables).
- Select the General tab.
- Specify the character encoding of the database.
- Select the Database -> Database Management tab.
- Specify the name of the imported XML file in the Choose XML data file field.
- Click the Create Database button.
The import/export feature can only be used to transfer data between two similar versions of TrackStudio. In the event that you have a database from an old version of TrackStudio that you want to transfer to another DBMS you should first upgrade the database to the latest version.