This section describes how to use TrackStudio Enterprise Server Manager to configure TrackStudio Enterprise.
Launch TrackStudio Enterprise Server Manager (sman.exe). Wait while it's loading, TrackStudio Enterprise Server Manager window will appear.
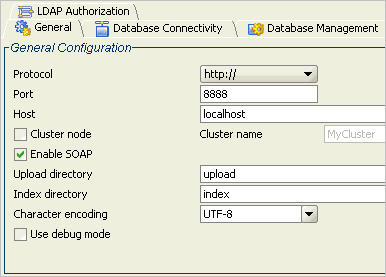
- General. On this tab you can specify TrackStudio Enterprise URL (http://localhost by default) and port (8888 by default). Here you can specify that this TrackStudio instance act as part of TrackStudio cluster. If you going to use TrackStudio IDE plugins or CVS integration you should enable TrackStudio SOAP API. Here you should specify upload directory, full text search index directory and character encoding. You can also switch debug mode on/off.
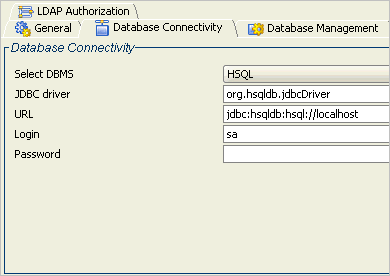
2. Database Connectivity. Here you can configure database connection options: database URL, JDBC driver, Login and Password. In the JDBC driver field there is a default JDBC Driver for HSQLDB that you shouldn't usually need to modify. After you have specified all the necessary connection properties, you can test the database connection by clicking the Test Connection button. Please note, that you should start DBMS before clicking the Test Connection button.
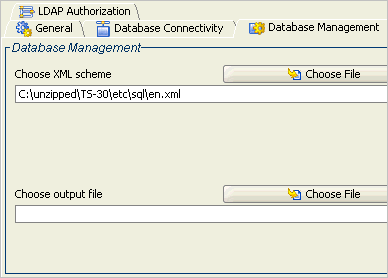
3. Database Management. On the Database Management tab you should enter path to database creation XML data file. You can enter it manually or browse it. To create the TrackStudio Enterprise database using a selected file, click the Create Database button. In the window that will be appear, you can click the Details button to see database creation details. If during the process of creating a new database an error occurred in one or more SQL operators, TrackStudio may work incorrectly or fail to work completely. Contact us, if such an error occurred. To upgrade the database from a previous version of TrackStudio Enterprise you should click the Upgrade Database button. To export the database you should click the Export Database button.
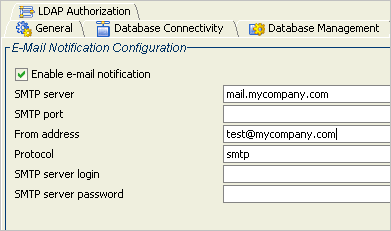
4. E-Mail Notification (optional). On this tab you can configure email notification properties. To turn this feature on you should check Enable e-mail notification. If checked, the following properties are enabled:
- SMTP server - SMTP host address;
- SMTP port - SMTP server port;
- From address - when sending notification, this address will be in the from field;
- Protocol - only smtp supported;
- SMTP server login - login to SMTP server (optional);
- SMTP server password - SMTP server password (optional);
To test the connection to the email server, click the Test Connection button.
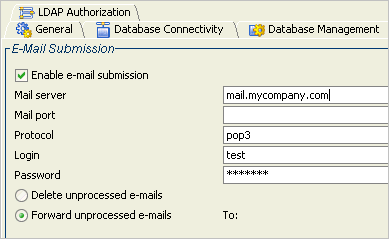
5. E-Mail Submission (optional). Here you can configure email submission properties. To turn this feature on, check Enable e-mail submission. You can edit the following properties:
- Mail server - POP3 host;
- Mail port - POP3 server port;
- Protocol - mail storing protocol, only pop3 supported;
- Login;
- Password;
- Delete unprocessed e-mails;
- Forward unprocessed e-mails;
You can also test the connection to the specified server by clicking the Test Connection button.
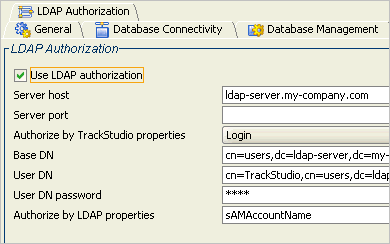
6.LDAP Authorization (optional). On this tab you can set the options for the LDAP server used to authorize users. For the authorization of users via the LDAP server, click the Use LDAP authorization checkbox and configure LDAP settings as described in the LDAP Authentication topic. You can test the connection to the LDAP server by pressing the Test Connection button.
7. Starting/Stopping TrackStudio Enterprise. To start TrackStudio Enterprise, press the Start button or select the Start item in the Server menu. To stop TrackStudio Enterprise, press the Stop button or the menu item. When started, you can press the Open window button and login into TrackStudio Enterprise. Also you can open your browser at the URL and port you have specified on the General tab.
Administrator login - root, administrator password - root.
8. Managing configuration. To save your current configuration options, press the Save button or the menu item. To load a configuration, press the Reload button. If you want to save the console output to a file, select the File->Save output as... menu item.
 Description